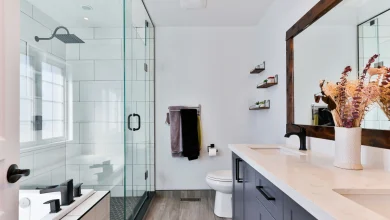
Space Optimization Strategies for Compact Bathrooms
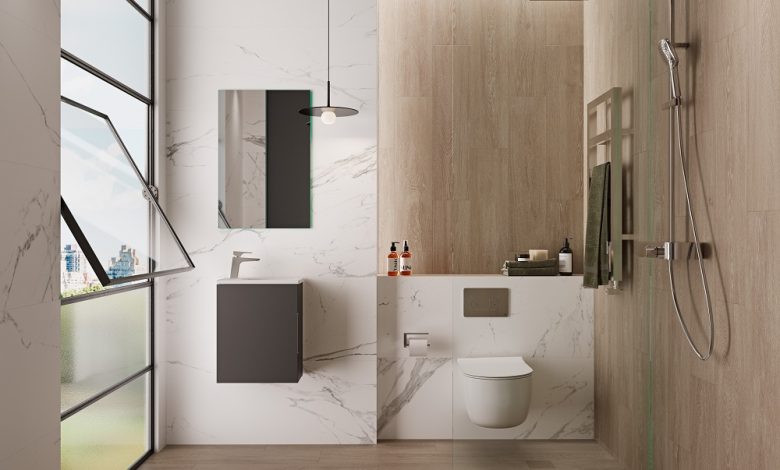
Small bathrooms often present a unique design challenge. They must function as high-traffic, highly utilitarian spaces while ideally serving as a relaxing sanctuary. When square footage is limited, standard layout choices and off-the-shelf fixtures can quickly make the environment feel cramped and chaotic. Maximizing a compact bathroom requires a deliberate shift from traditional design thinking. Instead of focusing solely on floor area, successful optimization leverages vertical space, optical illusions, scale alteration, and multi-functional elements. By implementing strategic architectural and interior design principles, you can transform a restrictive layout into an efficient, visually expansive, and sophisticated space.
Strategic Layout and Spatial Planning
The foundation of any successful compact bathroom design lies in the floor plan. When dealing with a tight footprint, moving plumbing lines can be costly, but rearranging the layout is sometimes the only way to unlock the room’s true potential.
Prioritizing Clear Pathways
A common mistake in small bathroom design is blocking the natural line of sight and movement. The path from the doorway to the primary fixtures, including the toilet, sink, and shower, must remain unobstructed.
-
Door Swings: A standard swinging door can consume up to nine square feet of usable floor space. Replacing a traditional hinged door with a pocket door that slides into the wall cavity instantly reclaims this area. If a pocket door is structurally impossible, reversing the hinges so the door swings outward into the hallway is an excellent alternative.
-
The Rule of Clear Floor Space: Maintain at least 21 inches of clear space in front of the toilet, sink, and shower entry. This satisfies standard building codes and ensures comfortable physical movement.
Linear versus Corner Configurations
In narrow bathrooms, a linear layout where the sink, toilet, and shower are aligned along a single wall is often the most efficient choice. This keeps plumbing centralized and leaves one side of the room completely open for movement. For square but compact layouts, corner configurations work best. Utilizing corner sinks, corner showers, or even corner toilets shifts the programmatic elements away from the center of the room, opening up the primary floor area and preventing a claustrophobic feel.
Maximizing Vertical and Wall-Mounted Dimensions
When horizontal square footage is depleted, the walls offer a vast, underutilized canvas for storage and functional fixtures. Shifting elements off the floor creates a sense of openness and simplifies maintenance.
Floating Fixtures
Grounding heavy cabinetry directly on the floor anchors the eye and visually shrinks the room. Floating elements break this optical boundary.
-
Wall-Hung Toilets: By concealing the flush tank inside the wall cavity, a wall-hung toilet saves up to ten inches of premium floor space. Furthermore, the continuous flooring extending beneath the bowl tricks the brain into perceiving a larger room.
-
Floating Vanities: Elevating the vanity off the floor exposes the tilework underneath. Even a few inches of clearance creates a lighter, airier aesthetic without sacrificing critical countertop surface.
Recessed Storage Solutions
Traditional shelving units project outward into the room, narrowing walkways and creating physical obstacles. Recessed storage utilizes the dead space between wall studs.
-
Stud-Bay Shelving: Standard interior walls have a depth of roughly four inches between studs. Cutting into the drywall to create recessed shelving units between these studs provides discrete storage for toiletries, towels, and toilet paper without stealing an inch of exterior space.
-
Recessed Medicine Cabinets: Ditch the surface-mounted mirror for a fully recessed medicine cabinet. Modern designs feature integrated LED lighting, internal electrical outlets, and sleek, frameless mirrors that sit completely flush with the wall.
-
Shower Niches: Avoid bulky plastic caddies that hang from the showerhead. A built-in, recessed shower niche keeps shampoo bottles and soaps organized and tucked away, preserving interior showering space.
High-Efficiency Fixtures and Smart Scale
In a compact bathroom, standard-sized fixtures can easily overwhelm the environment. Selecting items specifically engineered for scaled-down living is critical.
Streamlined Vanities and Sinks
The vanity is often the largest culprit of spatial crowding. Selecting a unit with a shallow depth can dramatically alter the flow of the room.
-
Narrow-Profile Vanities: Standard vanities are typically 21 to 24 inches deep. Opting for a narrow-profile vanity with a depth of 15 to 18 inches opens up the central walkway significantly.
-
Console Sinks: If storage can be managed elsewhere, replace the vanity entirely with a console sink. Supported by slender metal legs, console sinks offer minimal visual mass while providing a sophisticated, open aesthetic.
-
Asymmetrical Sinks: Many modern manufacturers design sinks with the faucet mounted to the side rather than the back. This allows the basin and the counter to be incredibly narrow while maintaining full functionality.
Innovative Shower and Bath Solutions
Forcing a standard bathtub into a small space often results in a cramped bathing area and a tiny walkway.
-
Curveless Walk-In Showers: Eliminating the traditional shower curb creates a seamless transition from the main bathroom floor into the shower zone. Using the same tile across the entire floor uninterrupted removes the visual boundary, making the entire bathroom feel like one large room.
-
Wet Room Concepts: In extreme cases, converting the entire bathroom into a wet room maximizes utility. By waterproofing all walls and floor surfaces, the shower barrier can be removed entirely, allowing fixtures to exist in closer proximity without water damage concerns.
-
Japanese Soaking Tubs: If a bathtub is a non-negotiable requirement, substitute a standard long tub with a Japanese soaking tub. These tubs have a much smaller footprint but are significantly deeper, allowing for full submersion while conserving floor space.
Visual Expansion and Material Selection
Optimizing a small space relies just as much on psychological perception as it does on physical dimensions. The colors, materials, and lighting strategies employed can visually enlarge a room.
Optical Lighting Techniques
A dimly lit bathroom feels cave-like and restrictive. A multi-layered lighting plan eliminates dark corners and expands boundaries.
-
Ambient and Task Lighting: Avoid a single overhead dome light, which casts harsh shadows. Combine recessed ceiling lights for overall brightness with eye-level vanity sconces to eliminate shadows on the face.
-
Toe-Kick and Under-Cabinet Lighting: Adding LED strip lighting beneath floating vanities or along the baseboards creates a weightless, hovering effect that visually lifts the room.
-
Vertical Light Distribution: Directing light upward toward the ceiling draws the eye vertically, making low ceilings feel substantially taller.
Cohesive Material Planes
Visual fragmentation shrinks a room. When the eye encounters contrasting colors and materials, it registers stops and starts, highlighting the room’s small size.
-
Monochromatic Color Palettes: Utilizing a unified color scheme, such as soft whites, light grays, or pale earth tones, creates a continuous field of vision. Paint the ceiling the same color as the walls, or one shade lighter, to erase the hard boundary where the wall ends.
-
Large-Format Tiles: Contrary to popular belief, small tiles with numerous grout lines make a space feel busy and confined. Large-format tiles require fewer grout joints, creating a cleaner, more expansive surface.
-
Glass Enclosures: Textured, frosted, or curtained shower enclosures chop the room into separate pieces. Opt for clear, frameless glass shower panels. The transparency keeps the entire footprint of the bathroom visible at all times.
Advanced Organization and Hidden Hardware
Clutter is the ultimate enemy of the compact bathroom. Implementing smart, hidden organization ensures that essential items are accessible but completely out of sight.
Over-the-Toilet Engineering
The space directly above the toilet tank is frequently wasted. Rather than installing a basic freestanding wire rack, design a custom over-the-toilet storage unit that matches the main cabinetry finish. Extending the vanity countertop across the top of the toilet tank as a narrow ledge creates extra surface area for decor or daily essentials without interfering with tank maintenance.
Inside-Cabinet Customization
The interior of a small vanity must be packed with efficiency. Standard cabinets leave vast amounts of empty vertical space inside.
-
Pull-Out Organizers: Install multi-tiered, pull-out wire baskets that curve around the under-sink plumbing lines. This brings items from the back of the cabinet directly to you.
-
Magnetic Strips: Mount magnetic strips inside cabinet doors to organize bobby pins, tweezers, nail clippers, and other small metallic grooming tools.
-
Integrated Outlets: Install electrical outlets inside drawers or cabinets so hair dryers, straighteners, and electric toothbrushes can remain plugged in and stored away, keeping the main countertop clear.
Frequently Asked Questions
How can I add ventilation to a compact bathroom without a window or exterior wall access?
When architectural constraints prevent a standard window or direct exterior wall penetration, you must install a high-capacity, ceiling-mounted exhaust fan rated for continuous operation. Ensure the fan is certified by the Home Ventilating Institute (HVI) and properly ducted through the roof or ceiling joists to the outside air. Look for models with a low sone rating for quiet operation, and consider an exhaust fan with an integrated humidity sensor that automatically activates when moisture levels rise.
What is the minimum comfortable clearance required between a toilet and a small vanity?
According to standard residential building codes, there must be a minimum distance of 15 inches from the centerline of the toilet to any adjacent wall, vanity, or physical obstruction. However, for a more comfortable and functional user experience in a compact layout, aiming for 18 inches from the centerline to the edge of the vanity is highly recommended if space permits.
Can I install a sliding barn door on a compact bathroom for space savings?
While a sliding barn door does eliminate the floor space required for a traditional door swing, it is generally not recommended for primary bathrooms due to acoustic and olfactory privacy concerns. Barn doors sit slightly away from the wall trim, leaving gaps on the sides that allow sound and odors to escape easily. A pocket door is a far superior choice for a small bathroom, as it seals tightly within the door frame while completely hiding inside the wall cavity.
Is it possible to convert a small half-bath into a full bath with a shower?
Yes, it is possible, provided you have a minimum footprint of roughly 3 by 8 feet or 5 by 5 feet. To accomplish this, you will need to utilize a wet room configuration or a highly compact corner shower kit measuring 32 by 32 inches. You will also need to assess whether your local building codes allow for the specific placement of the drains and if your existing drain lines can accommodate the added graywater volume of a shower.
How do I prevent mold and mildew growth in a compact wet room setup?
Preventing mold in a tight wet room requires a three-pronged approach: flawless waterproofing, proper pitch, and robust ventilation. The entire room must be sealed with a continuous waterproofing membrane beneath the tile. The floor must be precisely sloped toward the drain to eliminate standing water pooling in corners. Finally, leave the exhaust fan running for at least twenty minutes post-shower, or install a timer switch to ensure all residual airborne moisture is completely evacuated from the space.
Will installing a dark color palette make a compact bathroom feel completely unusable?
Not necessarily, though it requires precise execution. While light colors are the safest bet for maximizing brightness, a dark color palette can create a dramatic, sophisticated, and cozy envelope. If you choose dark walls, you must offset the absorption of light by using highly reflective materials, such as high-gloss tiles, polished chrome fixtures, expansive mirrors, and a robust, multi-layered artificial lighting system to prevent the space from feeling dark and dingy.